Upgrading your SSD in your Dell Mini 9 will give you an extreme performance boost making using your Mini 9 snappier and overall faster, with the higher-capacity models, you will also get a nice storage boost. Initially it was only possible to get up to 16GB of storage on Dell Mini 9 configurations, and most models only shipped with 8gb, now it is possible to have up to 64GB of storage on your Dell Mini 9.
Why the Runcore Drives?
The Runcore SSDs have been especially made for the Dell Mini 9. Many users have reported some impressive benchmarks with their experiences, especially when compared to the STEC drives supplied with stock Mini 9s. Runcore are also the only manufacturer to produce SSDs of up to 64GB for the Mini 9.
The Runcore drives also feature a micro-usb port for extremely easy drive swapping - without having to reinstall your operating system and programs.
Where can I buy one from?
Online retailer MyDigitalDiscount.com sell Runcore SSDs in 16GB, 32GB and 64GB formats, prices currently range from $69-$219.
Check out the Runcore SSDs on Sale here.
Now for the guide:
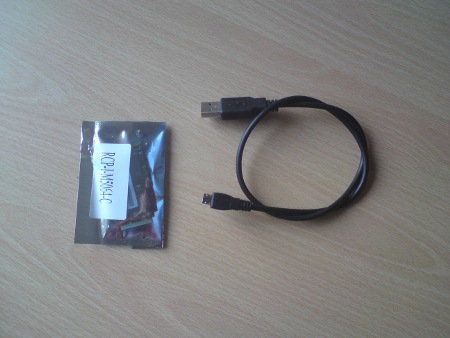
Your Runcore package will contain the following:
- Runcore SSD Drive
- Micro USB Cable
Setting up your new Drive
You have a decision to make, do you transfer your current operating system to your new drive or install afresh?
If you haven't already at any point - and you have the drivers + recovery disks handy + USB CD ROM Drive - we recommend a fresh install of your original operating system (XP or Ubuntu), Windows XP especially benefits from this, though bare in mind it may take a good 20 minutes or so to go through all the drivers. There are many sections on our forums which go into great depth on how to install other operating systems such as OSX, Vista, Windows 7 and more. Check that you have all the required software/hardware beforehand.
Cloning your Current Drive
If you have chosen to clone your drive (which most users without a external CD ROM drive will have to do) you will need to carry out this step. You will need to install some form of http://www.google.co.uk/search?hl=en-GB&q=drive+cloning+software on your Mini to clone your current drive. We recommend using http://www.acronis.com/homecomputing/products/trueimage/, the trial version will be enough to suit our needs for now. The official documentation for this program can be found http://download.acronis.com/pdf/trueimage7.0_ug.en.pdf.
You will need to make a back-up image of your current drive and restore it on your new Runcore drive,the Ruuncore drives very handily connect straight to USB port, simply acting as removable storage, making this step a breeze.
Getting into your Mini 9
(Thanks to acabtp for these images)
Start by turning the Mini over and removing the two screws indicated by the red circles. You will also need to remove your battery.
Use your finger to gently pry the module cover up at this area and pop it out
and remove it
Swapping the SSD
In the picture below I have labelled the SSD and the two screws you need to unscrew to remove it. Simply remove the screws and the SSD will "pop" up, allowing you to unplug it from its slot at an angle.
You will notice the stock SSD has heat pads on it, I recommend trying to remove these for use on your Runcore SSD - better safe then sorry I figured.
Once you have your original SSD in your hand, simply reverse this procedure to fit your new one, place the it in the slot an an angle first, then press it down and screw it in place.
If you have any problems removing your SSD, be sure to have a look at the official Dell service manual for help.
Voilà! Your new Runcore drive is successfully fitted, if you cloned your drive as mentioned earlier, you should be all set to go straight away! Otherwise...
Installing Your Operating System
If you need to install your operating system now is the time to. Connect your USB CD ROM drive to your Mini 9 and carry out whatever procedure you choose to setup your operating system.
Notes
- Make sure you don't use an even-slightly magnetic screw driver (which is il-advised when dealing with any form of disk anyway) as in removing the screws of the SSD I actually wiped it clean.
- Also with screws be careful when removing screws not to dead-head them, as then your drive will be stuck in permanently, this happened to me with both the WWAN and SSD!
- Try selling your old drive on ebay, after wiping it completely.
- Youtube has some interesting videos of people showing off their boot times with Runcore drives.


0 comments:
Post a Comment